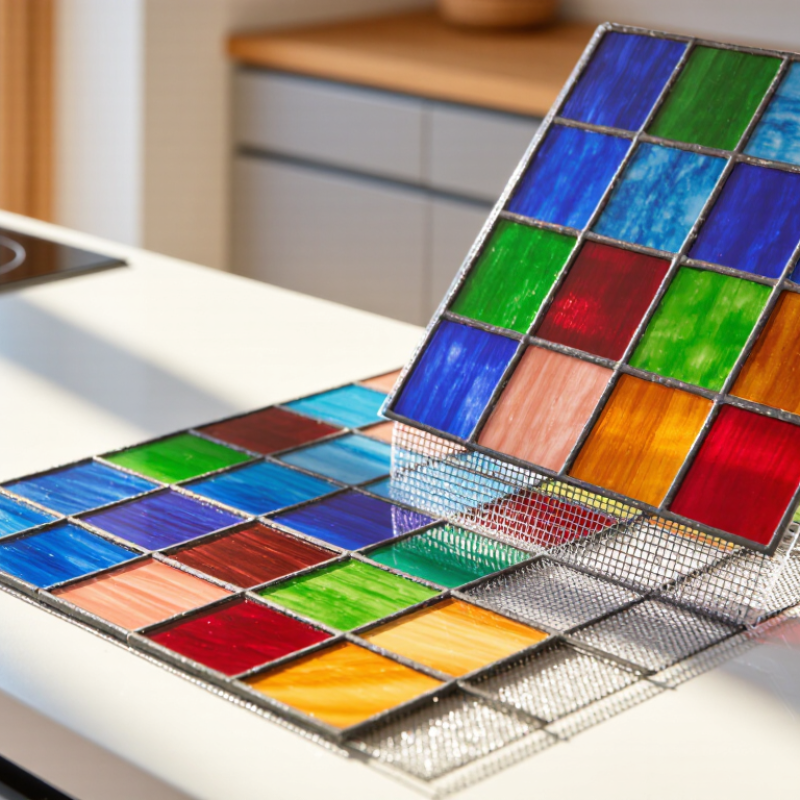
| Material | Decorative glass pieces mounted on a mesh-backed sheet | The sheet format helps align many small pieces and can reduce installation time compared with setting each tile individually. |
| Common Sheet Size | Approximately 300 × 300 mm (12 × 12 in), although sizes vary by product | A standard sheet size makes layout planning and quantity calculations more convenient. |
| Typical Tile Thickness | Commonly about 4–8 mm; verify the product specification before installation | Thickness affects transition height, trim selection, adhesive coverage, and the finished surface level. |
| Suitable Indoor Uses | Backsplashes, shower walls, bathroom walls, feature walls, niches, and decorative borders | Glass provides a reflective surface that can add color, light, and visual depth to interior spaces. |
| Wet-Area Consideration | Use only where the tile, adhesive, grout, substrate, and waterproofing system are approved for wet conditions | The tile itself may resist water, but joints and the wall assembly still require correct waterproofing and sealing details. |
| Outdoor or Freeze-Thaw Use | Confirm that the specific sheet, adhesive, grout, and installation system are rated for exterior and freeze-thaw exposure | Not every glass tile sheet is suitable for outdoor conditions, temperature changes, or prolonged moisture exposure. |
| Substrate Preparation | The surface should be clean, dry, firm, flat, and free of dust, grease, loose paint, and structural movement | A stable and even substrate improves bond strength and helps prevent uneven joints or cracked tiles. |
| Recommended Adhesive | A compatible white thin-set mortar or glass-tile adhesive, selected according to the tile and installation environment | White adhesive can help preserve the appearance of translucent or light-colored glass; always follow the product instructions. |
| Recommended Trowel | Often a small notched trowel, such as 3–6 mm, depending on tile size and adhesive requirements | The correct notch helps achieve consistent coverage without forcing excessive adhesive through the joints. |
| Dry Layout | Arrange sheets before spreading adhesive and check color variation, pattern alignment, borders, and cut locations | Planning reduces visible pattern breaks and minimizes unnecessary cutting or material waste. |
| Installation Method | Spread adhesive in small workable sections, press each sheet evenly, and use a grout float or beating block for alignment | Working in small areas helps prevent the adhesive from skinning over before the sheets are embedded. |
| Joint Alignment | Match the spacing between sheets to the spacing between individual tiles | Consistent joints make the sheets appear more like a continuous tiled surface. |
| Cutting | Use a glass-rated tile cutter or wet saw; wear eye protection and follow safe cutting practices | Proper tools help produce cleaner edges and reduce the risk of chipping or breakage. |
| Grouting | Apply compatible grout after the adhesive has cured, then remove residue with a damp sponge | The grout supports the tile edges and helps protect joints from moisture and dirt. |
| Movement Joints | Maintain perimeter and change-of-plane joints; fill them with an appropriate flexible sealant rather than rigid grout | Flexible joints accommodate minor movement and can help reduce cracking at corners and transitions. |
| Initial Curing | Allow the adhesive and grout to cure for the periods stated in their instructions before heavy cleaning or water exposure | Premature use can weaken the bond, disturb joints, or leave permanent surface residue. |
| Routine Cleaning | Use a soft cloth or non-abrasive sponge with warm water and a pH-neutral cleaner | Regular gentle cleaning removes soap film and surface dirt without dulling or scratching the glass. |
| Cleaning Products to Avoid | Avoid abrasive powders, steel wool, harsh solvents, and highly acidic or alkaline products unless specifically approved | Aggressive chemicals or abrasive tools may damage grout, sealants, decorative coatings, or the surrounding finish. |
| Maintenance Frequency | Wipe regularly; inspect grout and flexible sealant periodically, especially in wet areas | Early attention to stained grout, gaps, or failed sealant can help prevent moisture-related damage. |
| Material Planning | Measure the installation area and add approximately 10% for cuts, fitting, and possible breakage; use a higher allowance for complex layouts | Ordering a reasonable reserve helps maintain consistent color and pattern if replacement pieces are needed later. |